Rocking chairs are timeless pieces of furniture known for their charm and comfort. However, adding cushions can take your rocking chair experience to the next level by providing extra support and a cozy feel. If you’re looking to personalize your chair, learning how to make cushions for rocking chairs is an excellent DIY project that combines creativity and functionality.
In this guide, we’ll walk you through every step, provide tips on measuring accurately, and share ideas to enhance the overall comfort of your rocking chair. You’ll also find the answer for “How to make a rocking chair more comfortable?”
How to Make a Rocking Chair More Comfortable?
Learning how to make cushions for rocking chairs is one of the best ways to upgrade its comfort. Rocking chairs are inherently soothing, but with the right enhancements, they can become even more inviting. Whether you’re looking to relax with a book, enjoy a cozy evening by the fireplace, or take a refreshing nap, the following tips will guide you in making your rocking chair a haven of comfort.
1. Add Lumbar Support
Lumbar support is essential for maintaining proper posture and reducing strain on the lower back.
- Benefits: A lumbar cushion helps align your spine, preventing discomfort during extended use.
- Design Options: Choose memory foam lumbar cushions for customized support or make your own cushion as part of learning how to make cushions for rocking chairs.
- Attachment: Use Velcro, ties, or snaps to secure the cushion to the backrest, ensuring it stays in place while rocking.
Match your lumbar cushion fabric with the main cushions to create a cohesive look.
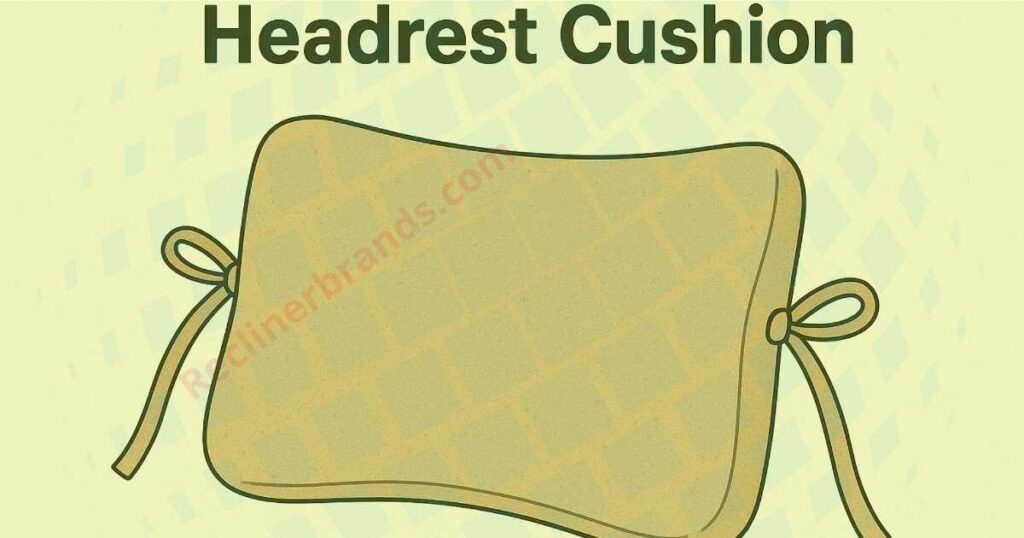
2. Create a Headrest Cushion
A headrest cushion enhances the relaxing experience by providing support for your neck and head.
- Positioning: Attach the headrest cushion at the top of the rocking chair’s backrest.
- Adjustability: Make the cushion adjustable with ties or elastic bands to accommodate users of different heights.
- DIY Option: Include a headrest cushion when learning how to make cushions for rocking chairs to ensure a perfect fit.
Consider adding decorative elements, like embroidery or button tufting, for a stylish touch.
3. Add Armrest Padding
Armrest padding is a simple yet effective way to make your rocking chair more comfortable.
- Materials: Use foam or batting wrapped in soft fabric for the padding.
- Attachment: Secure the armrest padding with Velcro straps or ties to keep it in place.
- Customization: Add padding in complementary colors or patterns to enhance the aesthetic appeal of your rocking chair.
Incorporate armrest padding into your design when learning how to make cushions for rocking chairs, so all elements match seamlessly.
4. Pair with a Footrest or Ottoman
Adding a footrest transforms your rocking chair into a complete relaxation station.
- Benefits: Elevating your feet reduces pressure on your lower back and legs, enhancing comfort.
- DIY Option: Make a matching ottoman or footrest as part of your project when figuring out how to make cushions for rocking chairs.
- Store-Bought Alternatives: Choose a pre-made footrest designed for rocking chairs, ensuring it complements your chair’s design.
For ultimate relaxation, select a rocking footrest that moves in sync with your chair.
5. Choose Soft, Breathable Fabrics
The fabric you choose for your cushions greatly impacts the overall comfort of your rocking chair.
- Breathability: Use fabrics like cotton, linen, or performance upholstery fabric that stay cool and comfortable during prolonged use.
- Softness: Opt for plush fabrics like velvet or microfiber for a luxurious feel.
- Durability: For outdoor rocking chairs, select weather-resistant fabrics to withstand exposure to sunlight and moisture.
When exploring how to make cushions for rocking chairs, consider stain-resistant or machine-washable fabrics for easy maintenance.
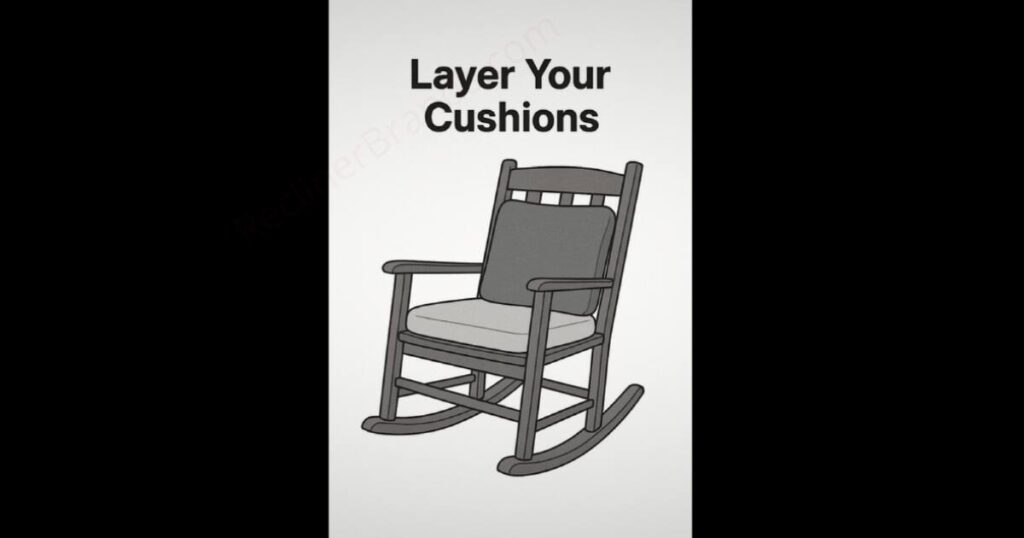
6. Layer Your Cushions
Layering cushions is an easy way to increase comfort and add visual appeal.
- Seat Cushion: Start with a thick, padded cushion to provide firm support.
- Backrest Cushion: Add a full-length backrest cushion for spine and shoulder comfort.
- Extra Pillows: Use decorative throw pillows for added lumbar or neck support.
Experiment with different cushion shapes and sizes when learning how to make cushions for rocking chairs, creating a layered effect that combines comfort with elegance.
7. Add a Non-Slip Base
To prevent cushions from shifting during use, incorporate a non-slip solution into your design:
- Non-Slip Fabric: Use rubber-backed fabric on the underside of the seat cushion.
- Anti-Slip Mats: Place a thin anti-slip mat beneath the cushion to keep it securely in place.
- Ties or Velcro: Secure the cushions to the chair frame for added stability.
Adding non-slip elements is a crucial step in mastering how to make cushions for rocking chairs that stay in place while you rock.
8. Incorporate a Blanket or Throw
A soft blanket or throw enhances the coziness of your rocking chair:
- Seasonal Options: Choose lightweight throws for summer and plush, warm blankets for winter.
- Styling: Drape the blanket over the backrest or armrest for easy access and aesthetic appeal.
- Matching Décor: Use a blanket that complements the colors and patterns of your cushions.
Select machine-washable blankets for practicality and easy care.
9. Reduce Noise and Squeaking
The soothing motion of a rocking chair can sometimes be interrupted by squeaks or creaks. Fix this with:
- Lubrication: Apply a silicone-based lubricant to the rocking chair’s joints and moving parts.
- Felt Pads: Attach felt pads to the bottom of the rocker runners to minimize noise and protect your floors.
- Secure Joints: Tighten any loose screws or bolts to eliminate unnecessary sounds.
Regular maintenance ensures your rocking chair remains silent and smooth, adding to its comfort.
10. Create a Relaxing Environment
The setting of your rocking chair is just as important as its cushions and padding:
- Lighting: Position the chair near a window for natural light or add a floor lamp for evening relaxation.
- Accessories: Place a side table nearby for your book, beverage, or favorite scented candle.
- Décor: Surround the chair with elements like plants, a rug, or artwork to create a calming atmosphere.
By incorporating these enhancements and focusing on how to make cushions for rocking chairs, you can transform your rocking chair into the ultimate comfort zone.

How Do You Measure for Rocking Chair Cushions?
Accurate measurements are essential for creating cushions that fit snugly and look great on your rocking chair. If you’re learning how to make cushions for rocking chairs, getting the dimensions right is the first step to ensuring a professional and functional result. Here’s a detailed guide on how do you measure for rocking chair cushions:
1. Measure the Backrest
The backrest is one of the most prominent parts of the rocking chair and requires precise measurements:
- Height: Measure from the top of the backrest to the point where it meets the seat. This will give you the vertical length needed for the cushion.
- Width: Measure the widest part of the backrest, usually near the top. If the backrest tapers down, note the narrower width as well.
- Curves and Shapes: If your rocking chair has a curved or contoured backrest, use a flexible measuring tape to follow the curve accurately.
Add at least an inch to the width and height measurements for seam allowances and padding.
2. Measure the Seat
The seat cushion is where most of the weight and wear will occur, so accurate dimensions are critical.
- Width: Measure from one side of the seat to the other, ensuring you account for the full seating area.
- Depth: Measure from the front edge of the seat to the point where it meets the backrest.
- Shape: If the seat has rounded corners or an irregular shape, trace its outline onto a piece of paper to create a template.
Add extra thickness to the cushion for comfort, especially if you’re using firm foam.

3. Measure the Armrests
If you plan to add armrest padding, include these measurements in your project:
- Length: Measure from the front edge of the armrest to the point where it attaches to the backrest or seat.
- Width: Measure across the armrest’s widest point.
- Thickness: Decide how thick you want the armrest cushions to be and factor this into your design.
4. Measure for Ties or Fasteners
To keep your cushions securely in place, you’ll need to measure the points where ties or fasteners will attach.
- Backrest Ties: Measure the distance between the top corners of the backrest where ties will attach.
- Seat Ties: Measure the width and depth of the seat to determine where the ties will secure to the chair frame.
If you’re using Velcro or snaps, measure the exact positions on the chair and mark them on your fabric for precise placement.
5. Account for Foam Thickness
Cushion thickness plays a big role in comfort and fit.
- Standard Thickness: A thickness of 2–4 inches is ideal for most rocking chair cushions.
- Adjust for Comfort: If you’re using high-density foam, a thinner cushion may suffice. For softer foam, you may need additional layers.
Factor in the foam’s compression when measuring. The cushion will slightly reduce in thickness once in use.
6. Consider Special Features
If your rocking chair has unique features like a curved seat, built-in armrests, or slats, you may need to adjust your measurements accordingly.
- Trace for Accuracy: Use large sheets of paper to trace the seat or backrest shape. This can act as a cutting guide for your fabric and foam.
- Gaps and Spaces: If the rocking chair has slats, ensure your cushion covers these gaps for better comfort and aesthetics.
Final Tips for Measuring Rocking Chair Cushions
- Use a flexible measuring tape to capture curved or irregular shapes.
- Write down all measurements and double-check them before cutting fabric or foam.
- Add an extra inch to all dimensions for seam allowances, padding, and any adjustments.
- If replacing old cushions, use them as templates to save time.
By following these steps, you’ll master how do you measure for rocking chair cushions, ensuring a perfect fit for your custom cushions. Accurate measurements not only improve the chair’s aesthetics but also enhance the overall comfort, making your rocking chair a cozy and stylish addition to your space.
How to Make Cushions for Rocking Chair: Step-by-Step Guide
Follow these steps to create custom cushions for your rocking chair:
Step 1: Measure Your Rocking Chair
Accurate measurements are crucial for well-fitted cushions. Answering “How do you measure for rocking chair cushions?” involves a few simple steps:
- Backrest: Measure the height and width of the backrest. Note any curves or unique shapes.
- Seat: Measure the depth (front to back) and width of the seat.
- Armrests (Optional): If you want armrest cushions, measure their length and width.
- Note Any Special Features: Take measurements for gaps, curves, or other areas that may require adjustments.
Write down these dimensions and add an extra inch to account for seam allowances and foam thickness.
Step 2: Choose Your Materials
Selecting the right materials is key to making durable and comfortable cushions.
- Fabric: Opt for upholstery fabric if the chair will be used heavily or outdoor fabric if the chair is placed on a patio.
- Padding: High-density foam works best for firm support, while batting is ideal for softer cushions.
- Fasteners: Decide between zippers for removable covers, Velcro for easy attachment, or ties to secure cushions to the chair.
For maximum comfort, choose breathable fabrics and layer foam with batting for a plush finish.
Step 3: Cut the Fabric and Foam
Using the measurements you took earlier, cut the fabric and foam.
- Fabric: Cut two pieces for each cushion (front and back). Add a 1-inch seam allowance around the edges.
- Foam: Cut foam pieces to match the final dimensions of the cushions.
- Marking: Use chalk or a fabric marker to mark where you’ll sew seams or add fasteners.
For curved edges, use a template or freehand the shape with chalk before cutting.
Step 4: Assemble the Cushions
Now it’s time to sew your cushions together:
- Pin the Fabric: Place the two fabric pieces with the right sides facing each other. Pin them along the edges.
- Sew the Edges: Sew around the edges, leaving one side open for inserting the foam. Use a straight stitch for durability.
- Insert Foam: Turn the fabric cover right-side out and insert the foam or batting. Adjust the foam to fit snugly.
- Close the Opening: Sew the remaining side closed by hand or with a sewing machine. If using a zipper, attach it before closing.
Step 5: Add Fasteners
Attach fasteners to secure the cushions to the rocking chair:
- Ties: Sew fabric ties to the back corners of the cushions and tie them around the chair frame.
- Velcro Strips: Attach Velcro strips to the back of the cushion and the chair for easy removal.
- Non-Slip Options: For a sleek look, use non-slip fabric on the underside of the seat cushion to prevent sliding.
Step 6: Test and Adjust
Place the cushions on your rocking chair and test for fit and comfort. Adjust seams, foam placement, or fasteners if necessary.
To enhance comfort further, layer the backrest cushion with extra batting or add lumbar support.
Creative Cushion Design Ideas for Your Rocking Chair
When learning how to make cushions for rocking chairs, the design possibilities are endless. Customizing your cushions not only adds to their functionality but also enhances the overall aesthetics of your rocking chair. Here are some expanded ideas to inspire your creativity and make your rocking chair cushions stand out:
1. Tufted Cushions
Tufted cushions are a classic design choice that adds sophistication and texture to your rocking chair.
- How to Create a Tufted Look:
- Sew buttons into the cushion fabric at evenly spaced intervals.
- Use strong thread to pull the buttons tight, creating dimples in the foam for a plush appearance.
- Match or contrast the button color with the fabric for added visual interest.
- Benefits:
- Tufting prevents the padding from shifting over time.
- It gives a professional, high-end look to your handmade cushions.
- Best Fabrics for Tufting:
Durable fabrics like velvet, leather, or heavy cotton work best as they hold the tufted design without tearing.
Use upholstery needles to make the tufting process easier, especially when working with thick foam.
2. Reversible Covers
Reversible cushion covers are a practical and stylish way to add versatility to your rocking chair.
- How to Make Reversible Covers:
- Choose two different fabrics with complementary patterns or colors.
- Sew the pieces together with a zipper or button closure for easy flipping.
- Ensure both sides are equally padded to maintain comfort.
- Advantages of Reversible Designs:
- Switch sides for a fresh look or to match seasonal décor.
- Extend the life of your cushions by evenly distributing wear and tear.
- Styling Tips:
Use one side with a solid color for a minimalist look and the other with a bold pattern for a more vibrant option.
Use waterproof or stain-resistant fabric for one side, especially if the chair will be used outdoors or in high-traffic areas.
3. Seasonal Themes
Seasonal-themed cushions let you celebrate the changing seasons while keeping your rocking chair stylish and cozy.
- Spring and Summer: Use light, airy fabrics with floral or tropical prints. Pastel shades like mint, lavender, and peach evoke the freshness of spring.
- Autumn: Opt for warm tones like mustard yellow, burnt orange, or deep red. Incorporate patterns like leaves or plaid for a cozy fall vibe.
- Winter: Choose rich fabrics like velvet or faux fur in festive colors like red, green, or metallics. Snowflake or Nordic patterns can enhance the seasonal charm.
- Swappable Covers: To make switching easier, create separate cushion covers for each season.
Add small decorative elements like tassels, pom-poms, or fringe to give seasonal cushions a unique and playful touch.
4. Bold Patterns
For those looking to make a statement, bold patterns can turn your rocking chair into a focal point.
- Choosing Patterns:
- Geometric Designs: Opt for sharp, modern lines or abstract shapes.
- Animal Prints: Add a touch of glamour with zebra stripes, leopard spots, or faux cowhide.
- Ethnic Prints: Use ikat, paisley, or tribal-inspired designs for an eclectic look.
- Monochrome Patterns: Black-and-white stripes or polka dots create a striking yet timeless appeal.
- Balancing Boldness: If the rest of your space is neutral, bold cushions can add color and character. Alternatively, use them sparingly in more vibrant settings.
Pair bold-patterned cushions with plain or neutral-colored rocking chairs to let the cushions stand out without overwhelming the space.
5. Personalized Cushions
Take your rocking chair cushions to the next level by personalizing them:
- Monograms: Embroider or print initials or family names onto the cushions for a classic touch.
- Custom Graphics: Use fabric printing techniques to add meaningful quotes, illustrations, or images.
- Patchwork Designs: Combine different fabric swatches to create a one-of-a-kind cushion with a vintage or bohemian vibe.
Personalized cushions also make thoughtful gifts for friends or family members who cherish their rocking chairs.
6. Layered Cushions
Layering adds depth and luxury to your rocking chair cushions.
- How to Layer:
- Use a larger base cushion for full seating support.
- Add smaller accent cushions, such as lumbar or headrest pillows, for targeted comfort.
- Mix textures, such as pairing a smooth fabric base cushion with a fluffy accent pillow.
- Why It Works: Layered cushions not only look plush but also allow you to customize support for different body areas.
Use complementary colors or patterns to create a cohesive yet dynamic layered look.
7. Functional Cushion Add-Ons
Incorporate functionality into your cushion designs for added convenience:
- Pockets: Sew fabric pockets onto the sides of the cushions to hold remotes, books, or glasses.
- Handles: Add fabric handles for easy removal or repositioning of the cushions.
- Non-Slip Backing: Use non-slip fabric or rubberized material on the underside of the seat cushion to keep it securely in place.
When mastering how to make cushions for rocking chairs, the design possibilities are only limited by your imagination. Whether you prefer tufted elegance, bold statement patterns, or versatile reversible covers, you can tailor the cushions to your personal style and needs.
FAQs (Frequently Asked Questions): How to Make Cushions for Rocking Chair
Q1. How do you measure for rocking chair cushions?
Answer: To measure for rocking chair cushions, take dimensions for the backrest, seat, and armrests. Add an extra inch to your measurements for seam allowances and foam thickness.
Q2. How to make a rocking chair more comfortable?
Answer: To make a rocking chair more comfortable, add lumbar support cushions, headrests, armrest padding, or a footrest. Choose soft, breathable fabrics for maximum relaxation.
Q3. What is the best fabric for rocking chair cushions?
Answer: Durable fabrics like cotton, linen, or outdoor upholstery fabric are ideal for rocking chair cushions. For outdoor use, select weather-resistant materials.
Q4. How thick should the cushion foam be?
Answer: A foam thickness of 2–4 inches works well for rocking chair cushions. Thicker foam provides more comfort but may require deeper seams.
Q5. Can I use old cushions as templates?
Answer: Yes, if you’re replacing old cushions, use them as templates to ensure your new cushions fit perfectly. Adjust measurements if needed.
Conclusion
Learning how to make cushions for rocking chair is a rewarding DIY project that allows you to personalize your furniture while enhancing comfort. From accurate measurements to material selection and sewing techniques, this guide provides everything you need to create beautiful, functional cushions.
By following these steps, you can also tackle related projects like improving comfort and designing custom styles. Whether you’re crafting for your own rocking chair or as a thoughtful gift, your handmade cushions will add a touch of elegance and coziness to any space.